
Getting started
This guide takes you from nothing to a running Featly dashboard with a live feature flag in a few minutes. Featly embeds inside your ASP.NET Core process (like Hangfire): two DI calls plus a middleware mount and you are operational.
1. Install
Section titled “1. Install”For the embedded quickstart (server + dashboard + SQLite, all in your app):
dotnet add package Featly.Serverdotnet add package Featly.Dashboarddotnet add package Featly.Storage.SqliteA consumer that only reads flags from a remote Featly server needs just the SDK:
dotnet add package Featly.Sdk2. Wire it up (embedded)
Section titled “2. Wire it up (embedded)”using Featly.Dashboard;using Featly.Server;using Featly.Storage.Sqlite;
var builder = WebApplication.CreateBuilder(args);
builder.Services.AddFeatlySqliteStore(); // a featly.db file, schema auto-appliedbuilder.Services.AddFeatlyServer(); // admin + SDK HTTP APIs, auth, approvals, webhooks
var app = builder.Build();
app.MapFeatlyDashboard("/featly"); // dashboard UIapp.MapFeatlyApi(); // /health/live + /api/admin/* + /api/sdk/*
app.Run();Set an admin key in appsettings.json so you can authenticate:
{ "Featly": { "Server": { "AdminApiKey": "replace-with-a-strong-secret", "SdkApiKey": "replace-too" } }}Run it, then open http://localhost:<port>/featly. The default project and a
development environment are created on first boot.
3. Get an admin identity
Section titled “3. Get an admin identity”The AdminApiKey above is a bootstrap shortcut. For a real, auditable admin
identity (so approvals attribute to a person), use the CLI’s first-run bootstrap
against the running server — it works only while no users exist yet:
dotnet tool install -g Featly.Clifeatly bootstrap-admin --identifier you@example.com --server-url http://localhost:5080It prints an admin token once. Store it; it acts as your user. Mint more
keys later with featly apikey generate --name ci --user you@example.com.
4. Create a flag
Section titled “4. Create a flag”Via the dashboard (log in with the admin key or token), or via the API:
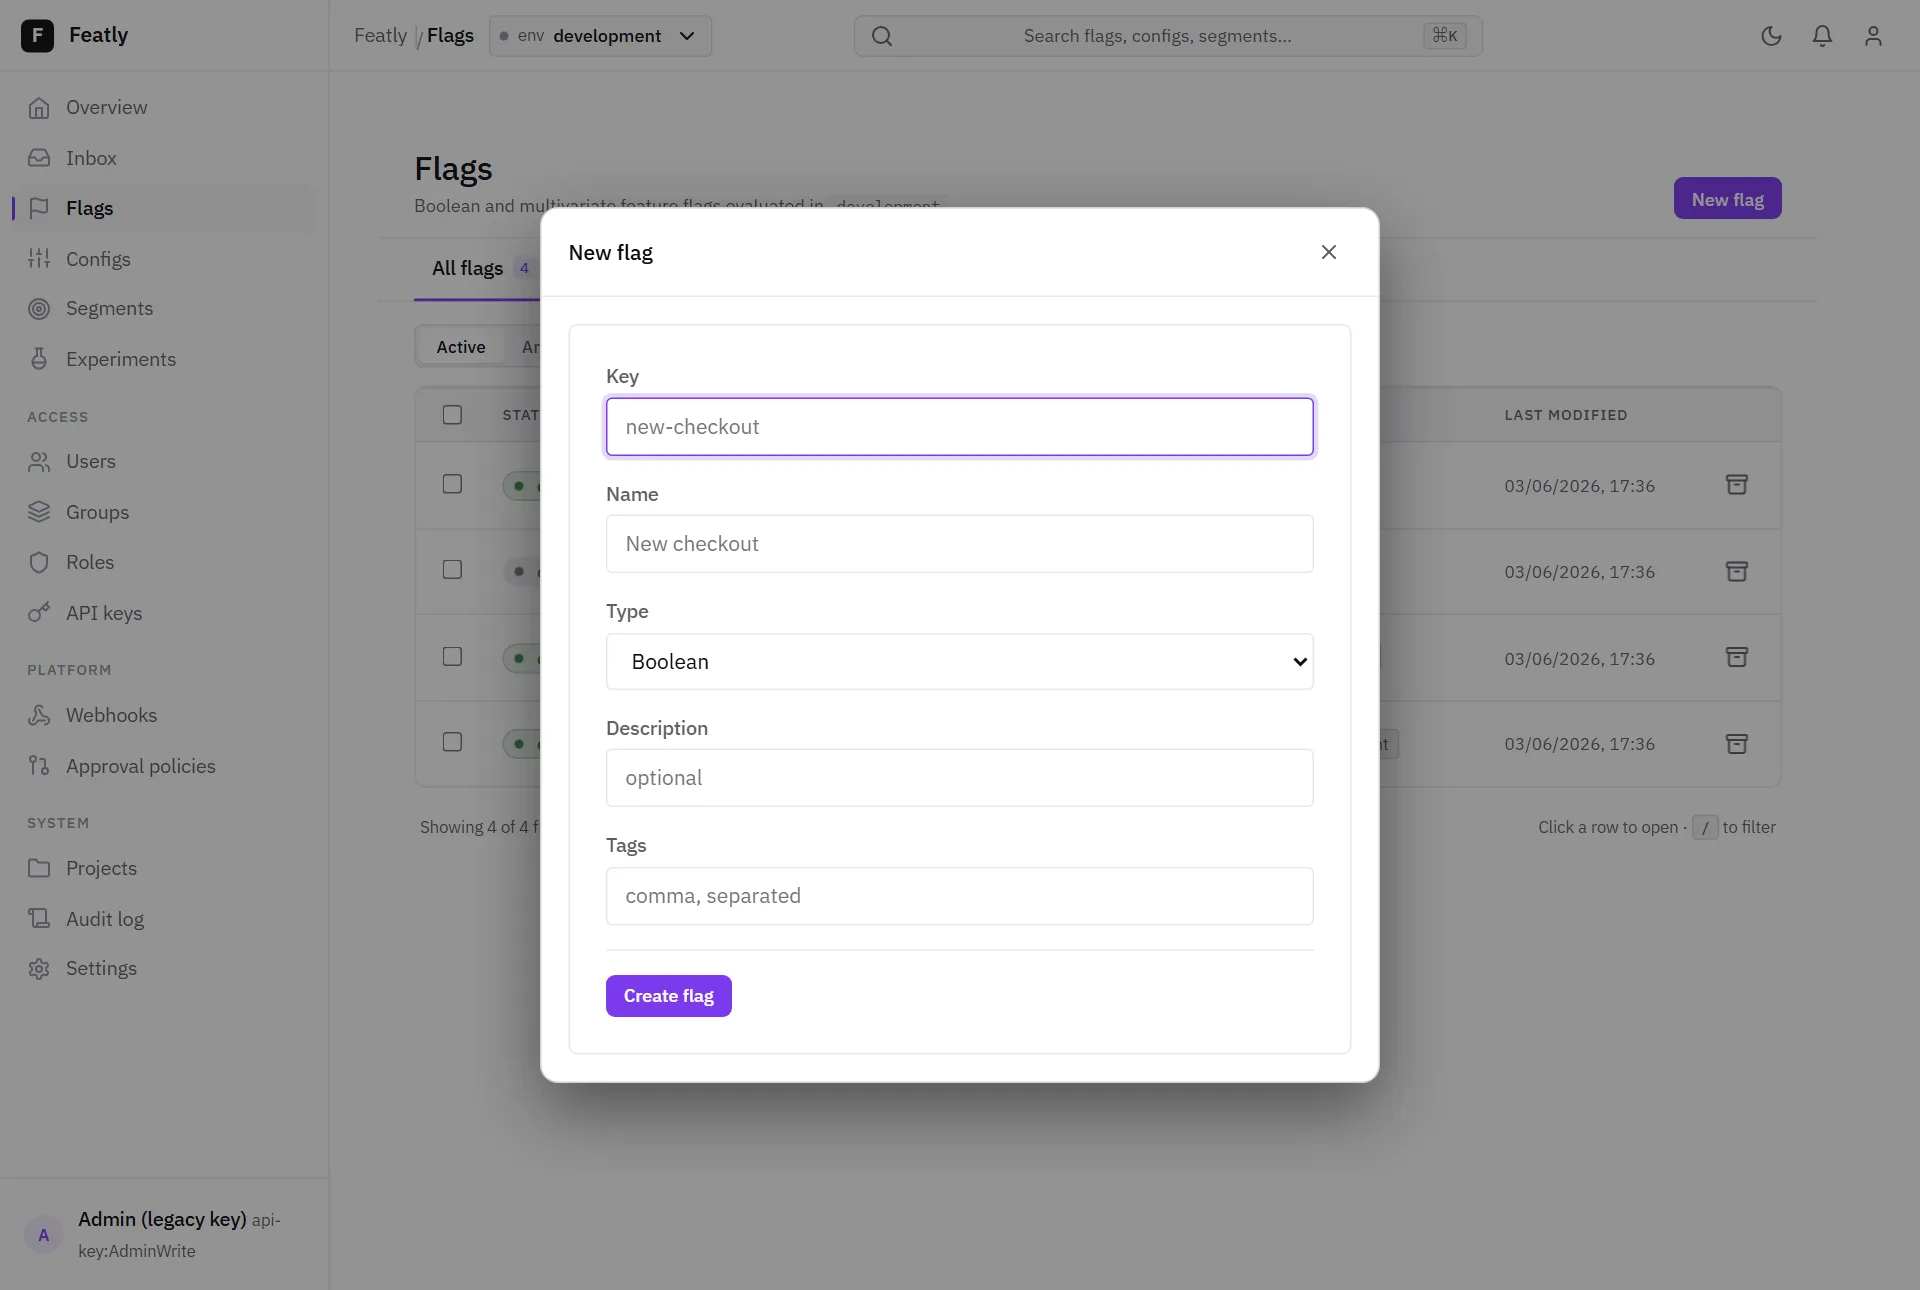
curl -X POST http://localhost:5080/api/admin/flags \ -H "Authorization: Bearer <admin token>" -H "Content-Type: application/json" \ -d '{ "key": "new-checkout", "name": "New checkout", "type": "Boolean", "enabled": true, "defaultVariantKey": "off", "variants": [ { "key": "on", "name": "On", "value": true }, { "key": "off", "name": "Off", "value": false } ], "rules": [ { "order": 1, "outcome": { "variantKey": "on" }, "conditions": [ { "attribute": "user.country", "operator": "Equals", "value": "BR" } ] } ] }'This flag is on for user.country=BR, off otherwise.
In the dashboard, the same flag is created from the New flag modal and edited with the visual rule editor:
5. Evaluate it from your app
Section titled “5. Evaluate it from your app”In the consuming application (or the same app), register the SDK and evaluate locally — there is no network call on the hot path; the SDK serves a cached, fresh-by-default snapshot:
builder.Services.AddFeatly()    .UseServer("http://localhost:5080", "replace-too"); // SDK key
// ...var featly = app.Services.GetRequiredService<Featly.IFeatlyClient>();
var ctx = new Featly.EvaluationContext { TargetingKey = "alice" };ctx.Attributes["user.country"] = "BR";
bool useV2 = await featly.Flags.IsEnabledAsync("new-checkout", ctx);
Prefer a vendor-neutral API? Use the OpenFeature provider —
the same flag, read through Api.Instance.GetClient().
Next steps
Section titled “Next steps”- Dashboard tour — every major screen, with screenshots.
- Configuration — every setting, the three-layer precedence, environment variables, the CLI.
- Deployment — the three deployment patterns and a production checklist.
- OpenFeature — adopt the OpenFeature API.
Runnable samples
Section titled “Runnable samples”samples/SelfHosted.Sample— embed everything in one app (this guide).samples/WebApi.Sample— an SDK consumer with targeting + a config demo.samples/Centralized.Sample— a standalone Featly server other apps point at.samples/OpenFeature.Sample— reads flags through the OpenFeature client.